Tech Tips

Using the SWIVL Camera
If you haven't already...
Download the SWIVL app on your iPad through the App Store. There are 4 choices. The one that says "SWIVL" will do.
Parkside teachers: If you are using the iPad that we have assigned to the SWIVL you don't need to download software, unless you would like this on your teacher iPad.
If the SWIVL is charged, you may unplug the charger and take the SWIVL and tripod. It should stay charged all day.
1. On your iPad, open the SWIVL app. USE "LOGIN TO GOOGLE," but USE YOUR dsdmail.net email. You will be re-directed to Office 365. Re-type your email, and password as directed. You should see yourself in the front iPad camera. If it isn't working, close the app and re-open it.
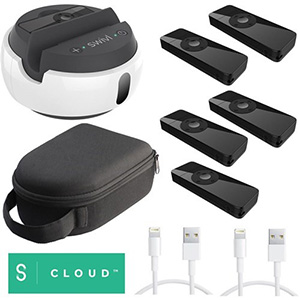
2. REMOVE the "marker" or teacher mic from the SWIVL base and place it around your neck and adjust it so that it is not touching anything that will make noise while recording. Don't turn it on just yet.
3. REMOVE YOUR iPAD FROM THE CASE. Place the iPad securely on SWIVL camera. You will need to REMOVE THE iPAD CASE. If your device doesn't fit, there are two more shims in the SWIVL container that can be switched out.
4. ATTACH the lightning cable from the SWIVL to your iPad.
5. TURN ON the SWIVL (power button is on the SWIVL in front of the iPad.
6. TURN on the "marker" or teacher mic by holding in the grey power button on the mic.
7. At this point, both lights on the top of the SWIVL, in front of the iPad should be "green."
8. Get ready to teach your lesson. When you are ready, Hold the record button on the marker. If you are close to the iPad you should see the white button with a red square in the middle indicating the program is recording.
9. Don't stop the recording until you are finished. If you want the button on the marker to pause instead of stop, that can be changed in the SWIVL settings. You can always trim out anything unwanted at the end of the video.
10. When you are finished, push the record button on the marker to top the recording (or pause if you changed the setting). You can remove the lightning cable and remove the iPad from the SWIVL at this point.
11. On the iPad, give the video a name. The video is automatically uploaded to SWIVL cloud. You may choose to download it to your iPad or delete it from the iPad after it uploads.
12. Place the marker back into the SWIVL base, matching the contacts on the marker to the contacts on the base, so the items will charge properly.
13. Take the unit back to where it lives. Plug in the charger. Check the back...make sure both the marker light and the base light show they are charging. If the marker light is not charging, you need to "reseat" it so it can charge.
14. If you are using the additional 4 markers, plug those in and re-charge them also (most people initially will not be using the markers – Let me know if you'd like training on recording whole class (group) audio also – we'll learn it together).
If you would like me to add any helps to this, please use the Contact page or add the information to a service request in Encore.
